Journal Entry Juiciness
-Juiciness With Breakout clone:
-> Adding some colors;
-> Camera shake;
-> Bricks setup;
->Juicy ball hit;
->Ball trail;
->Confetti;
->Sounds.
Notes:
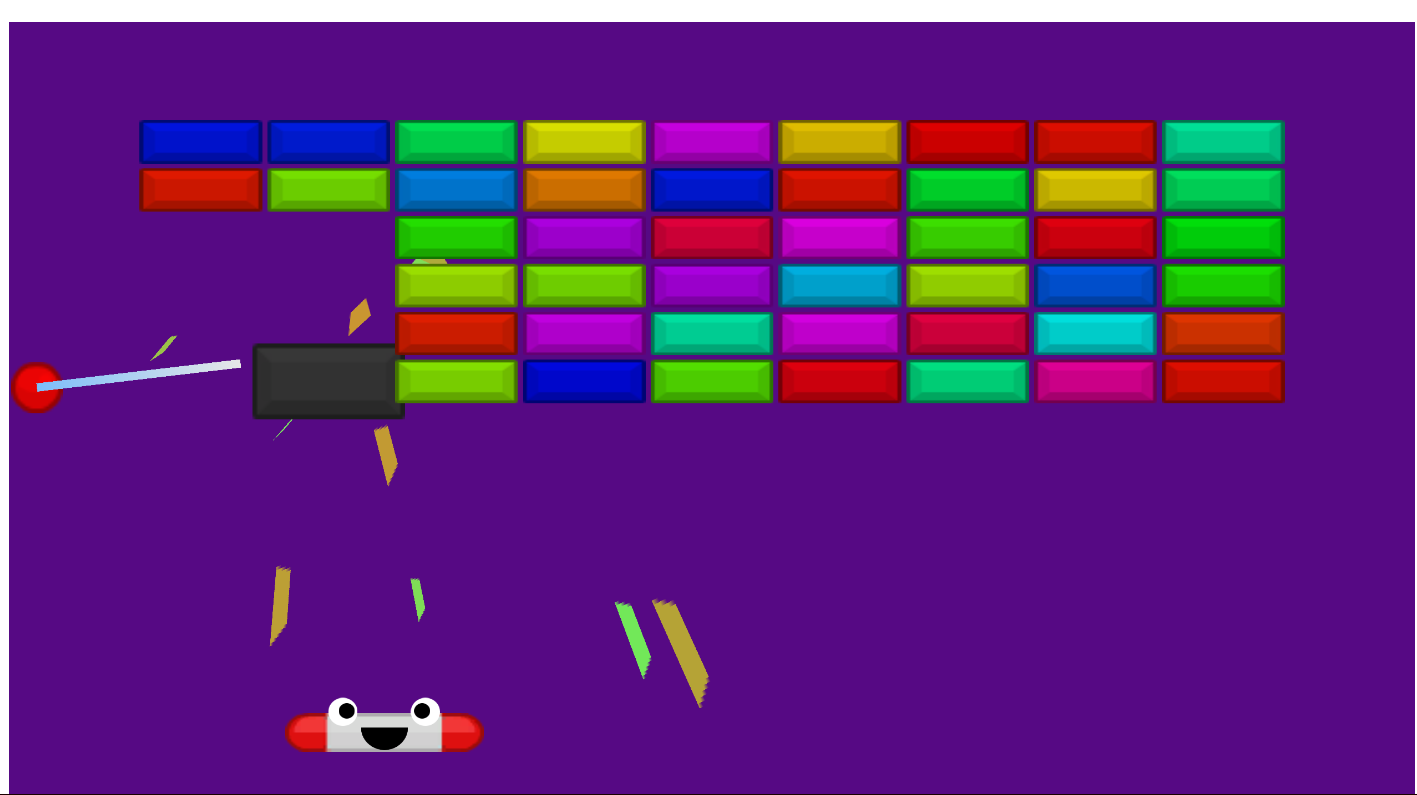
I began my journey of enhancing Juiciness in the game by changing the colors of the bricks. I decided to make each brick a random color. To achieve this, I added three lines of code to the SetupBrick() function in the GameController.cs script:
Сolor randomColor = Random.ColorHSV(0f, 1f, 1f, 1f, 1f, 1f);
SpriteRenderer s = brick.GetComponent<SpriteRenderer>();
s.color = randomColor;
After generating the random color, the code retrieves the SpriteRenderer component attached to the "brick" GameObject and sets its color property to the generated random color. This effectively changes the color of the brick to the randomly generated color each time SetupBrick() is called.
Next, I wanted to add two things. When the ball collided with an object, I wanted the background color to change for 3 seconds and the camera to shake in different directions. I could achieve the color change as follows:
Camera camera = Camera.main;
camera.DOColor(new Color(88/255.0f, 9/255.0f, 135 / 255.0f), 0.3f);
When I was writing the code for camera shake, my main preference was for the camera to return to its initial position after shaking. During work, I struggled for a while to figure out how to return the camera to its initial position. This task took up a significant portion of my time. But then I remembered that I could call the OnComplete(...) function. Combining these two points, I came up with the following line:
camera.DOShakePosition(0.2f, 0.3f).OnComplete(ReturnToOriginalPosition);
…
private void ReturnToOriginalPosition()
{
// Tween the camera's position back to its original position
camera.transform.DOMove(_originalPosition, 0.5f);
}
All the changes were made in OnCollisionEnter2D() function in the Ball.cs script.
I also wanted to add an animation for the appearance of the bricks. I rotated all the bricks by 180 degrees along the Y-axis and made them appear from a faded state. This was done in the SetupBrick() function in the GameController.cs script as follows:
brick.transform.DORotate(new Vector3(0, 180, 0), 1f);
s.DOFade(1f, 2f).From(0f); // SpriteRenderer s = brick.GetComponent<SpriteRenderer>();
It was interesting to add changes to the ball when it collides with an object. I decided to change the color of the ball from white to red, as well as increase its size for 3 seconds. This was done in the OnCollisionEnter2D() function in the Ball.cs script:
sr.DOColor(new Color(1f, 0f, 0f), 0.3f);
this.transform.DOScale(3f, 0.3f).SetEase(Ease.OutBounce).SetEase(Ease.InOutSine);
After that, I wanted to add a trail that shows the trajectory of the ball during the game. To achieve this, I used a built-in Trail effect. I right-clicked the object in the Hierarchy, went to Effects, and selected Trail. Then, I adjusted the settings in the TrailRenderer component in the Inspector. Next, in the Ball.cs script, I added a reference to this object and instructed it to follow the position of the ball:
public void StartMoving() {
…
trailRenderer.transform.position = this.initialPosition; // Follows the ball's position.
}
Additionally, I didn't like that the entire ball trajectory remained from the beginning of the game. I wanted to remove all trails after the ball collided with another object. Therefore, I decided to add a method in OnCollisionExit2D() in this script where I would delete the trail after each collision with another object:
void OnCollisionExit2D(Collision2D collision)
{
trailRenderer.Clear(); // Сleans the ball's path after hitting something
}
Also, I wanted to congratulate the player for hitting a brick, so I added confetti. I right-clicked the object in the Hierarchy, went to Effects, and selected Particle System. In the Inspector for the object, I adjusted parameters like gravity, size, color, quantity, and others. But most importantly, I wanted the confetti to burst at the locations where the ball hit the brick. Therefore, in the Brick.cs script, I added a reference to the Particle System object and added the following code to the OnCollisionEnter2D() function:
confettiParticleSystem.transform.position = this.transform.position;
At the end, I wanted to add sound effects that would play when the ball collided with an object. I had to add an Audio Source component to the ball object in the Inspector. To achieve this, I added the following parts of the code to the Ball.cs script:
public AudioClip soundSFX;
private AudioSource _audioSource;
public void StartMoving() {
…
_audioSource = GetComponent<AudioSource>();
…
}
private void OnCollisionEnter2D(Collision2D collision) {
…
_audioSource.PlayOneShot(soundSFX);
…
}
Invested hours:
• Scripts: 5h 13 min
Outcome: Not yet
⎯⎯⎯⎯⎯⎯⎯⎯⎯⎯⎯⎯⎯⎯⎯⎯⎯⎯⎯⎯⎯⎯⎯⎯⎯⎯⎯⎯⎯⎯⎯⎯⎯⎯⎯⎯⎯⎯⎯⎯⎯⎯⎯⎯⎯⎯⎯⎯⎯⎯⎯⎯⎯⎯⎯⎯⎯⎯⎯⎯⎯⎯⎯⎯⎯
Date: 4.5.2024
Activity:
- Juiciness With Breakout clone:
-> Juicy brick hit;
-> Stretchy paddle;
-> Paddle face;
-> Game fade in/out;
-> Slow motion.
- Built the Unity project
Notes:
After completing the first part described above, I proceeded to further improve the game.
Next, in my work, I wanted to add an animation that would play during the destruction of bricks. I decided that if something collided with a brick, it would change its color to a shade of gray and increase in size. Also, I wrote the following code in the OnCollisionEnter2D() function in the Brick.cs script:
private void OnCollisionEnter2D(Collision2D collision) {
var csr = _sr.color.grayscale;
_sr.DOColor(new Color(csr, csr, csr), 0.2f);
this.transform.DOScale(new Vector3(3f, 3f, 0), 0.3f).OnComplete(() =>
{
// remove the brick from the list in GameController and destroy the GameObject
GameController.instance.BrickDestroyed(this);
});
…
// Disable the collider so the ball cannot collide with the brick while it's disappearing
this.GetComponent<BoxCollider2D>().enabled = false;
}
In this step, I attempted to explore a dynamic scaling mechanism for the paddle in response to mouse cursor movement. By evaluating the offset between the cursor and the paddle's position, we determined scaling factors to adjust the paddle's size along both the horizontal and vertical axes. Additionally, I implemented this in the Paddle.cs script as follows:
void Update() {
// Calculate the offset of the mouse cursor from where the paddle is
float deltaX = mousePos.x - transform.position.x;
float deltaY = mousePos.y - transform.position.y;
// Calculate the scale factor based on the offset
float scaleFactor = 1 + Mathf.Abs(deltaX) * responsiveness;
// Apply the scale factor to the paddle's scale
transform.localScale = new Vector3(paddleScale.x * scaleFactor, paddleScale.y, paddleScale.z);
// store the position of the mouse cursor
this.mousePos = Camera.main.ScreenToWorldPoint(Input.mousePosition); // convert from screen coordinates to world coordinates
}
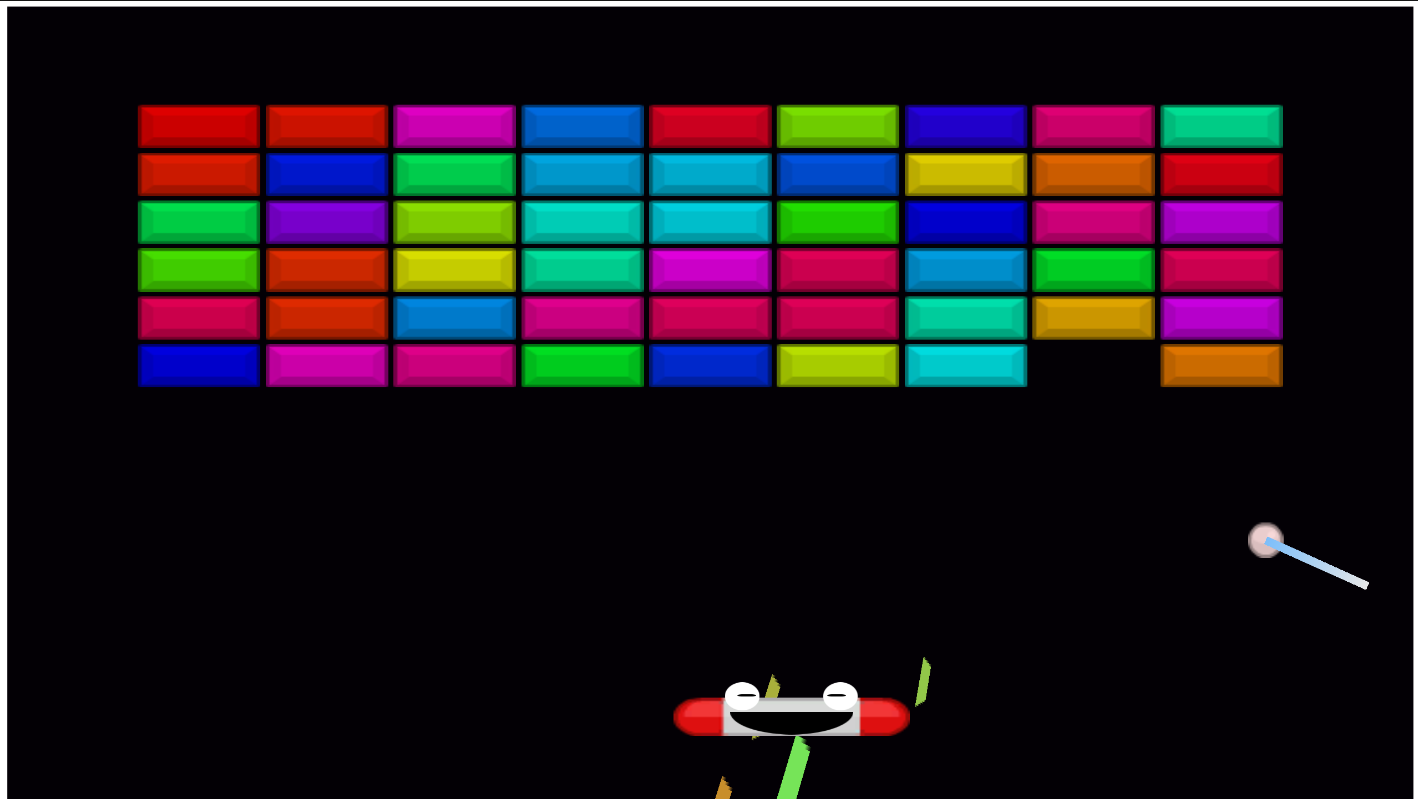
Next, I wanted to add a face to the paddle, including animations for the eyes and mouth. One of the challenging tasks for me in this part was implementing eye blinking at random intervals. I decided to use a coroutine WaitForSeconds(...) for this purpose, which initially worked only during the first game launch. However, when the entire game was reset, it no longer executed. To address this issue, I had to move the call to the coroutine-containing function into function Update(), but only if the condition that the animation was not currently playing was true. The following code illustrates the eye-blinking animation implemented in the Paddle.cs script:
public GameObject leftEyeOuter;
public GameObject leftEyeInner;
public GameObject rightEyeOuter;
public GameObject rightEyeInner;
private float minWinkInterval = 1.0f; // Minimum interval between winks
private float maxWinkInterval = 5.0f; // Maximum interval between winks
private bool _isAnimation = false;
void Update() {
// TODO: Handle what happens each frame
// Perform the winking animation for the left eye
if(_isAnimation == false)
{
StartCoroutine(WinkRandomly());
_isAnimation = true;
}
…
}
private IEnumerator WinkRandomly()
{
while (true)
{
// Wait for a random interval before winking
yield return new WaitForSeconds(Random.Range(minWinkInterval, maxWinkInterval));
// Perform winking animation for left eye
Wink(leftEyeInner);
// Perform winking animation for right eye
Wink(rightEyeInner);
}
}
private void Wink(GameObject eyeInner)
{
eyeInner.transform.DOScaleY(0.301125f, 1f);
// Scale down the inner part of the eye in the Y-axis to 0.03 and then back to normal scale
eyeInner.transform.DOScaleY(0.03f, 0.8f).SetLoops(1, LoopType.Yoyo).OnComplete(() =>
{
// After winking, tween the scale back to its original value
eyeInner.transform.DOScaleY(0.301125f, 1f);
});
}
And then I was able to see the eye animation.
Animating the mouth was much simpler:
public GameObject smile;
private void OnCollisionEnter2D(Collision2D collision) {
Ball ball = collision.gameObject.GetComponent<Ball>();
if (ball != null) {
…
// Show smiling face when the paddle hits the ball
smile.transform.DOScaleX(0.46f, 0.7f).SetLoops(1, LoopType.Yoyo).OnComplete(() =>
{
// After winking, tween the scale back to its original value
smile.transform.DOScaleX(0.1926739f, 1f);
});
}
}
Next, I wanted to darken the game during a reset. Therefore, in the script, I decided to add a fade-out effect in GameController.cs in the ResetGame() function . Here's how I implemented it:
public void ResetGame() {
// Hide the ball and the paddle
ball.gameObject.SetActive(false);
paddle.gameObject.SetActive(false);
// Fade out the black overlay at the end of the game
blackOverlay.DOFade(1f, 1f).OnComplete(() =>
{
trailRenderer.enabled = false;
// hide the ball and the paddle
ball.gameObject.SetActive(false);
paddle.gameObject.SetActive(false);
// show the black overlay
blackOverlay.color = new Color(blackOverlay.color.r, blackOverlay.color.g, blackOverlay.color.b, 1);
// destroy previous bricks
while (bricks.Count > 0) {
RemoveBrick(bricks[0]);
}
// hide the black overlay
blackOverlay.color = new Color(blackOverlay.color.r, blackOverlay.color.g, blackOverlay.color.b, 0);
// setup the level
SetupLevel();
// Fade in the black overlay for the new round
blackOverlay.DOFade(0f, 1f);
});
}
Finally, I wanted to learn how to slow down my game if the player holds down the Space key. To achieve this, I had to add two checks for Space press and release in the Update() function in the GameController.cs script, one for slowing down and the other for returning the game to its normal state. Here's how I did it:
private void Update()
{
…
// Check if the Space key is pressed to activate slow motion
if (Input.GetKeyDown(KeyCode.Space))
{
// Slow down the game
DOTween.To(
() => Time.timeScale, // Getter function
x => Time.timeScale = x, // Setter function
0.5f, // End value
1f // Duration of the tween
).SetEase(Ease.Linear); // Ease setting for smooth transition
}
// Check if the Space key is released to return to normal speed
if (Input.GetKeyUp(KeyCode.Space))
{
// Return speed back to normal
DOTween.To(
() => Time.timeScale, // Getter function
x => Time.timeScale = x, // Setter function
1f, // End value
1f // Duration of the tween
).SetEase(Ease.Linear); // Ease setting for smooth transition
}
}
Using these methods, I created a game that looked like this:


Invested hours:
• Scripts: 4h 25 min
• Build of project: 5 min
Outcome: Breakout-base-with-DOTween_Build.zip (uploaded to the itcho.io page as a .zip file)
Files
Get Project T
Project T
mff-gdintro-2024-t
More posts
- Journal Scripting Walkthrough 2Mar 31, 2024
- Journal Scripting WalkthroughMar 24, 2024
- Journal Entry 2Mar 08, 2024
- Journal Entry 1Feb 29, 2024
Leave a comment
Log in with itch.io to leave a comment.